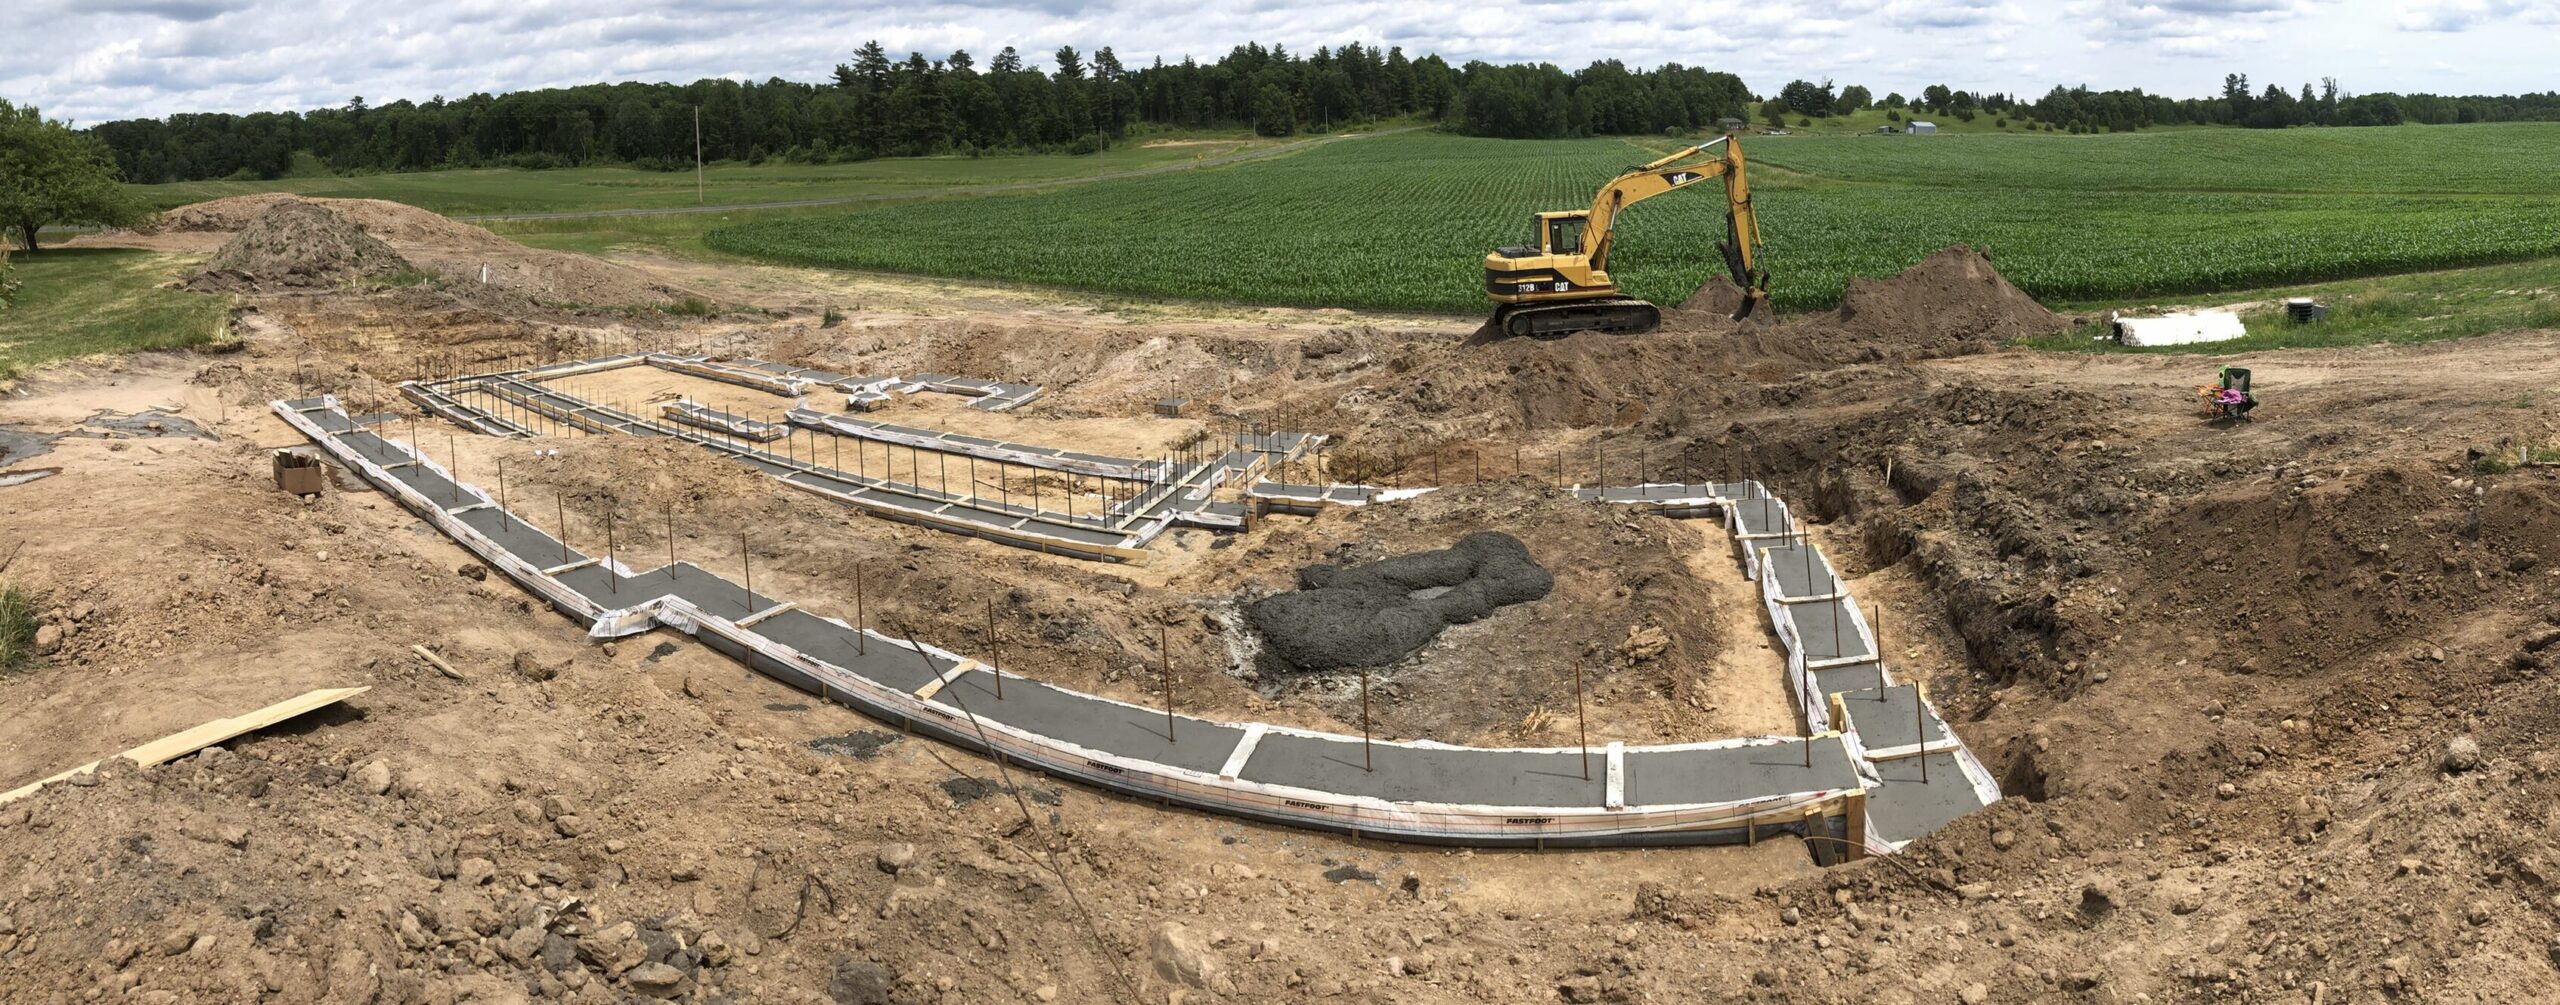
Prepping the Footings
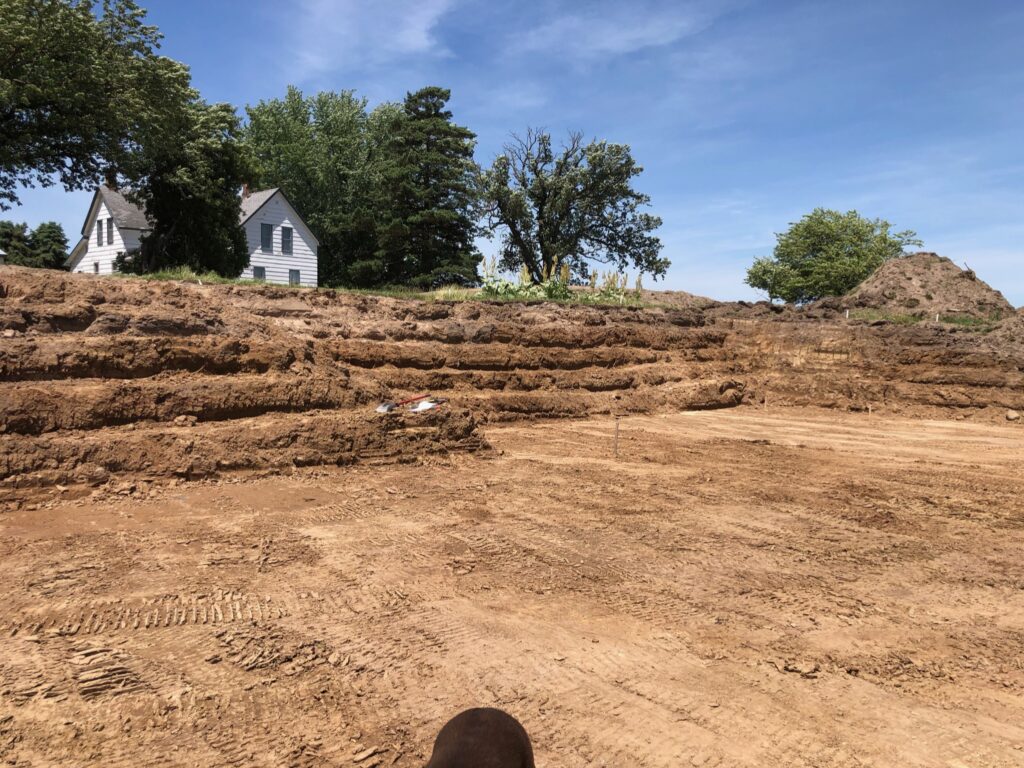
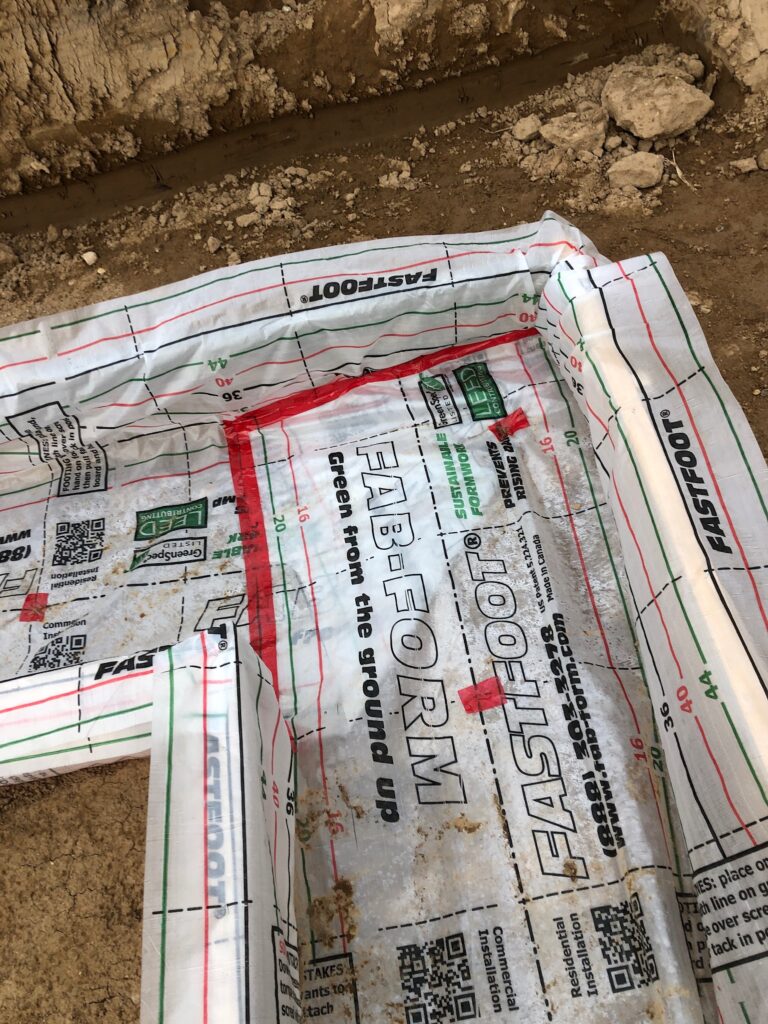
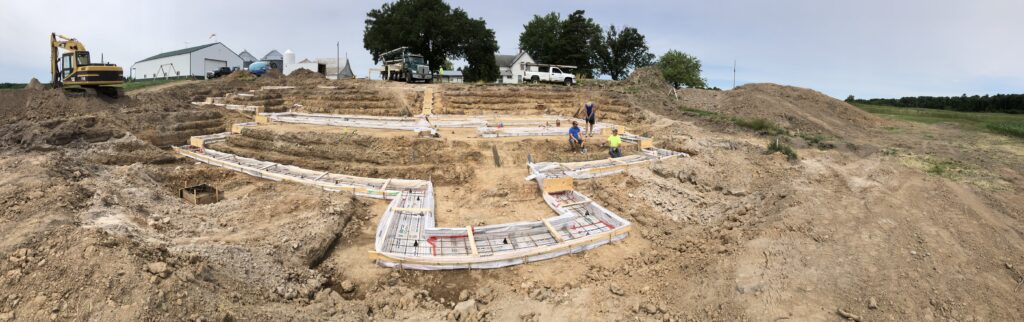
In the hot summer sun of June 2020, we started working on the footings. We had a family friend do the excavator work and the family jumped in and helped form the footings. The funniest and the most frustrating memory I have about this step of the building process was figuring out how to install the Fastfoot. As you can see from the photos, we built the wood framing for the footings and then installed a high density polyethylene fabric called Fastfoot (go to link to read more about the benefits). Fastfoot replaces the need for using lumber and plywood to form the concrete footings. Joe, my husband, put my sister-in-law and I in charge of installing the majority of it. Our method to the madness was quite interesting. One of us would get on our hands and knees, resembling a stretched out frog, spreading the Fastfoot on the ground slightly wider then the wood stakes and the other stretching it up and over the top horizontal boards and stapling it in. The laughter made it bearable and there was the occasional, “why me?” moments as well but we managed to get it done. Once the Fastfoot was installed, we laid the rebar inside and made sure everything was secure and ready for concrete.
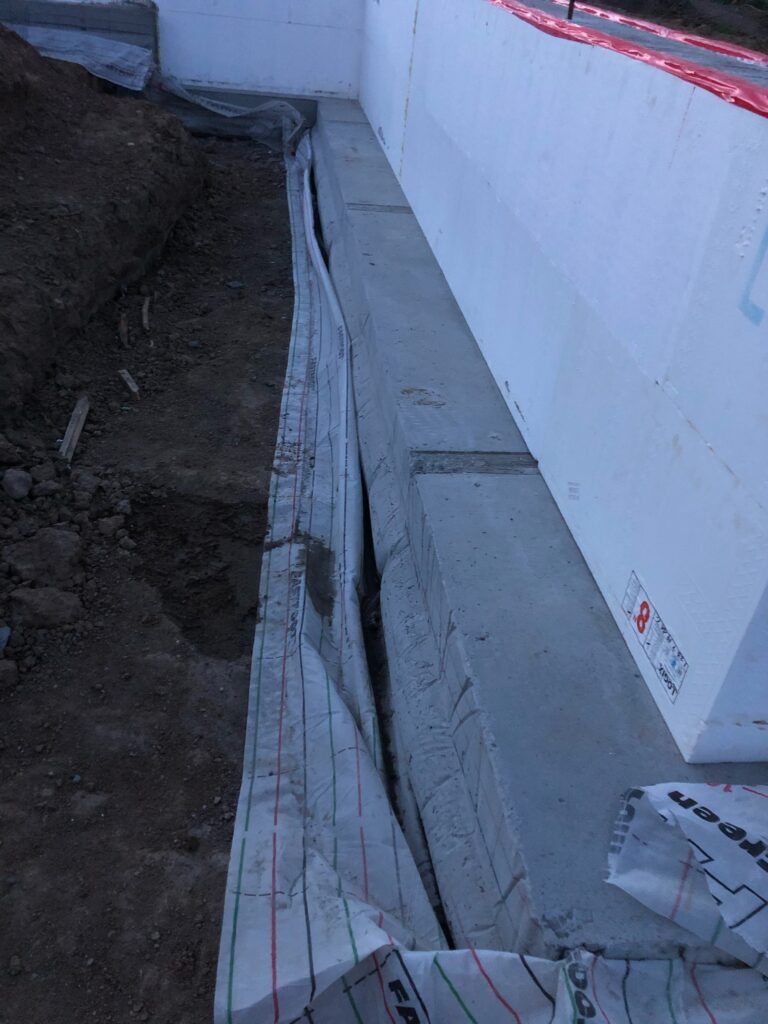
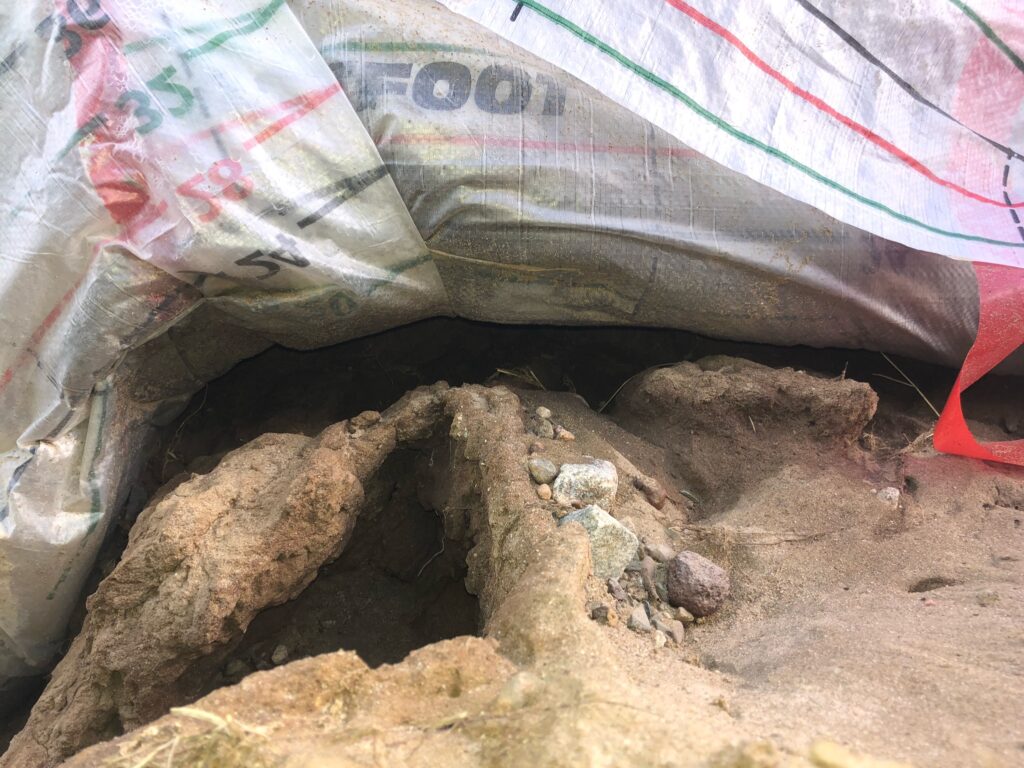
We did run into some problems afterwards though that needed to be fixed. One of the purposes of using Fastfoot is preventing groundwater from getting into the concrete. When we took off the wood form, the Fastfoot was not staying up on the concrete (see image above). So, I drilled holes in the concrete using a rotary hammer drill and secured the Fastfoot by pounding in a nail into the holes. The other issue we had was that the dirt under the stepped footings was washing out taking away the support under the concrete. My husband ended up putting cement underneath to remedy that issue. In the end, we would recommend this product.
lol, oh the memories!!!
Absolutely 👍 Amazing what you All of accomplished …
Absolutely Amazing 🤩 what you All have accomplished …